Talk to your documents with aitomChat – a HuggingChat extension

HuggingChat is an open source alternative for ChatGPT by HuggingFace.  With aitomChat we extend the functionality of HuggingChat by enabling you to talk with your documents.

aitomChat is seamlessly integrated into HuggingChat.

Unlike OpenAI’s ChatGPT this solution provides real privacy for your PDFs and other document types. By being able to run locally in an Intranet or Private Cloud it is the ideal solution for companies that want to allow their employees to talk with the company’s data.

Learn everything, from Chat UI to Inference and Retrieval Augmented Generation (RAG) in the YouTube video below:


Get aitomChat here:

Need further support or consulting?

Please checkout our Consulting hours.

Compose LangChain AI Apps (Auto-generates Python Code)

Learn how you can compose a fully functional LangChain app without writing a single line of code. We demonstrate this live in this YouTube video by utilizing the latest release of our AI automation software aitom8.

You can get aitom8 here:

Auto-generated Python Code (Sample: HuggingFace Pipeline)

app.py

#!/usr/bin/env python3

# Basic libraries
from dotenv import load_dotenv
import os

# Required for LangChain prompts and llm chains
from langchain import PromptTemplate, LLMChain

# Required to load the model via local HuggingFace Pipelines
from huggingface.pipeline.transformer import loadModel
# Alternative:
# from huggingface.pipeline.parameter import loadModel

# Load environment variables from .env file
load_dotenv()

def create_prompt(question : str, llm : str):

    template = """Question: {question}
    Answer: Let's think step by step."""
 
    prompt = PromptTemplate(template=template, input_variables=["question"])

    llm_chain = LLMChain(prompt=prompt, llm=llm)
    print(llm_chain.run(question))

def main():

    llm = loadModel(model_id="bigscience/bloom-1b7")
    #llm = loadModel(model_id="OpenAssistant/oasst-sft-4-pythia-12b-epoch-3.5")    

    create_prompt(question="What is the capital of France?", llm=llm)

if __name__ == "__main__":

    main()

huggingface.pipeline.transformer

#!/usr/bin/env python3

# Required for Langchain HuggingFace Pipelines
from langchain import HuggingFacePipeline

# Required for direct HuggingFace Pipelines  
from transformers import AutoModelForCausalLM, AutoTokenizer, pipeline

def loadModel(model_id : str) ->any:  

    llm = HuggingFacePipeline(pipeline=getTransformerPipeline(model_id))                
    return llm

def getTransformerPipeline(model_id : str) ->pipeline:

    match model_id:
        case "bigscience/bloom-1b7":
            tokenizer = AutoTokenizer.from_pretrained(model_id)
            model = AutoModelForCausalLM.from_pretrained(model_id)

            # device_map: -1...use CPU, 0...use first GPU, ..., "auto"...use all GPUs
            device_map="auto"

            transformerPipeline = pipeline(
                "text-generation", model=model, tokenizer=tokenizer, max_new_tokens=18, device_map=device_map
            )  

        case _:
            print("No pipeline available for model: " + model_id)
            exit()

    return transformerPipeline

Need further support or consulting?

Please checkout our Consulting hours.

AI app virtualization with aitom8 (conda or venv)

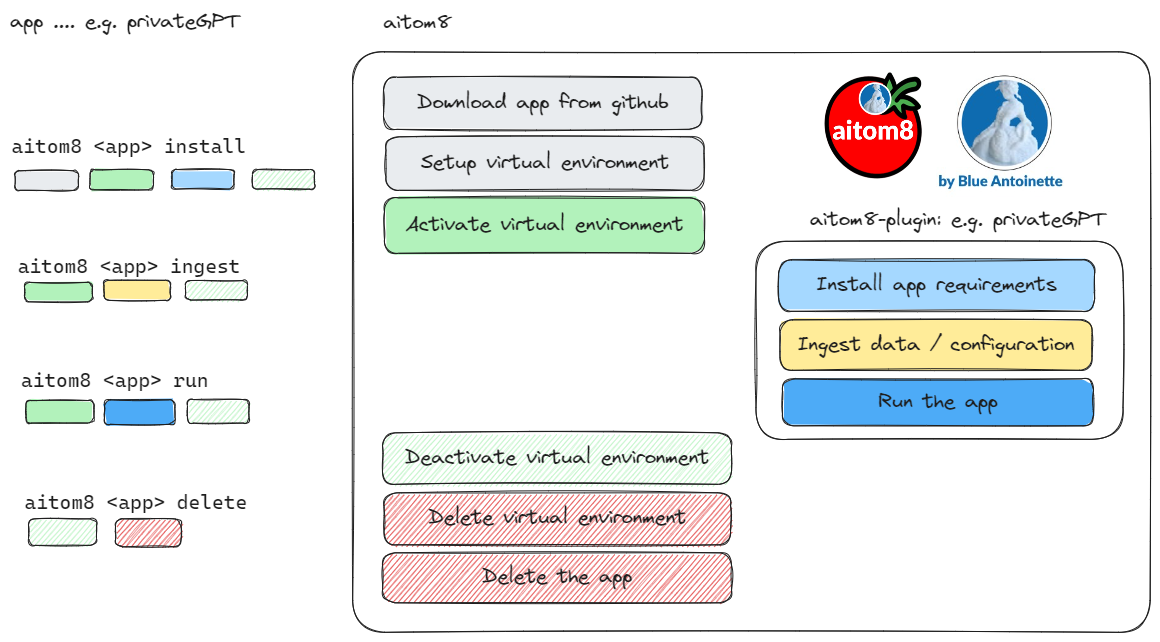
When you run your favorite open source AI apps on your system you usually download the apps from a repository like github, then you install the requirements, then  e.g. in the case of privateGPT you ingest the data and then you run the app.

However, all AI apps have different requirement and if you do not want to mess up your system you manually create and activate a virtual environment with conda (or pyenv and venv) before actually installing the app requirements. When you are finished with the app you probably deactivate and maybe delete the virtual environment and the AI app again.

Since this process is very time consuming to perform all these steps manually over and over again, we have developed aitom8 that automates all these steps for you.


Learn more in our YouTube video AI automation with aitom8:


You can get aitom8 here:

Running HuggingChat locally (VM)

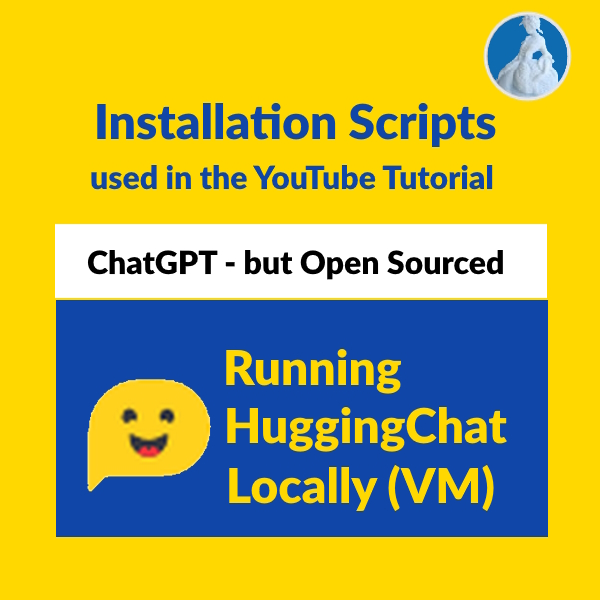
Learn how you can run HuggingChat, an Open Sourced ChatGPT alternative, locally (on a VM) and interact with the Open Assistant model, respectively with any Large Language Model (LLM), in two variants.

Variant 1: Run just the Chat-UI locally and utilize a remote inference endpoint from Hugging Face

Variant 2: Run the whole stack, the Chat-UI, the Text Generation Inference Server and the (Open Assistant) LLM on your Virtual Machine

Installing HuggingChat with the Installation Scripts created in this video

If you want to get the HuggingChat Installation Scripts that we created in the course of this video feel free to purchase and download our HuggingChat Installation Scripts.

Alternatively, if you want to get your hands dirty, you find the scripts at the bottom of this page.

NEW! Installing HuggingChat with aitom8 and the HuggingChat aitom8 plugin

New: In the meanwhile we have created aitom8 which is a professional AI Automation software that automates a variety of open source projects (optionally in virtual environments like conda). For HuggingChat there is an aitom8 plugin available that allows you to install HuggingChat with just one command.

aitom8 huggingchat install

You can get aitom8 and the HuggingChat aitom8 plugin here:


NEW! Code Llama 34B model with Inference and HuggingChat | Local Setup Guide (VM) and Live Demo

New: In this video you can see a variant 3 required for downloading Llama models with your local inference server.

NEW! Talk to your documents with HuggingChat and the aitomChat extension

Learn everything, from Chat UI to Inference and Retrieval Augmented Generation (RAG) in the YouTube video below:

Get aitomChat here:


Installing HuggingChat manually

If you want to get your hands dirty, feel free to set up HuggingChat with the instructions and scripts below.

Prepare your Linux VM

Install Curl: 

sudo apt install curl

Install NVM (Node Version manager):

curl -o- https://raw.githubusercontent.com/nvm-sh/nvm/v0.39.3/install.sh | bash
nvm -v

Install the latest LTS release of Node.js and npm:

nvm install --lts
node -v
npm -v

Install and run the HuggingChat UI locally

Create new npm project (AI):

mkdir ~/dev/AI
cd ~/dev/AI
npm init

Update package.json:

{
  "name": "ai",
  "version": "1.0.0",
  "description": "Start Apps",
  "main": "index.js",
  "scripts": {
    "start-mongodb": "docker run --rm --name mongodb  -p 27017:27017 -d -v ~/dev/mongo:/data/db mongo",
    "stop-mongodb": "docker stop mongodb",
    "install-chat-ui": "cd ./scripts && ./install-chat-ui.sh",
    "update-chat-ui": "cd ../chat-ui && git pull",
    "start-chat-ui": "cd ../chat-ui && npm run dev -- --host 127.0.0.1",
    "list-mongodb-collections": "docker exec -i mongodb sh -c 'mongosh --eval \"db.getCollectionNames()\" chat-ui'",
    "list-conversations": "docker exec -i mongodb sh -c 'mongosh --eval \"db.conversations.find()\" chat-ui'",
    "drop-database": "docker exec -i mongodb sh -c 'mongosh --eval \"db.dropDatabase()\" chat-ui'",
    "start-inference": "cd ./scripts && ./start-text-generation-inference.sh",
    "show-filesystem": "sudo df -Th && echo && sudo lsblk && echo && docker system df"
  },
  "author": "",
  "license": "ISC"
}

Create scripts directory: 

mkdir ~/dev/AI/scripts

Create this script in the scripts directory:

install-chat-ui.sh

#!/usr/bin/env bash
sudo apt-get install git-lfs
sudo rm -R ../../chat-ui
cd ../.. && git clone https://huggingface.co/spaces/huggingchat/chat-ui
cd ./chat-ui && npm install
if [[ -f "../AI/data/chat-ui.env" ]]; then
 cp -v ../AI/data/chat-ui.env .env.local
fi
Make the script executable :
chmod u+x ~/dev/AI/scripts/install-chat-ui.sh
Install the Chat-UI :
npm run install-chat-ui

Copy .env file to  .env.local:

cp ~/dev/chat-ui/.env ~/dev/chat-ui/.env.local

Create the MongoDB (with npm and Docker):

npm run start-mongodb

Adapt ~/dev/chat-ui/.env.local file to your needs:

MONGODB_URL=mongodb://localhost:27017/
HF_ACCESS_TOKEN=#hf_<token> from from https://huggingface.co/settings/token

Copy your  .env.local file as chat-ui.env file into the ~/dev/AI/data directory (to allow fully automated reinstalls):

mkdir ~/dev/AI/data
cp ~/dev/chat-ui/.env.local ~/dev/AI/data/chat-ui.env

Run the Chat-UI:

npm run start-chat-ui

Install and run the Text Generation Inference Server locally

Create this script in the scripts directory:

start-text-generation-inference.sh   (Important: if you are not running Nvidia A100 GPU then you need to pass the parameter –disable-custom-kernels )

#model=bigscience/bloom-560m
model=OpenAssistant/oasst-sft-4-pythia-12b-epoch-3.5
num_shard=2
volume=$PWD/../../inference-data # share a volume with the Docker container to avoid downloading weights every run
name="text-generation-inference"
docker run --rm --name $name --gpus all --shm-size 1g -p 8081:80 \
    -v $volume:/data \
    ghcr.io/huggingface/text-generation-inference:latest \
    --model-id $model --num-shard $num_shard \
    --disable-custom-kernels
Make the script executable :
chmod u+x ~/dev/AI/scripts/start-text-generation-inference.sh

Run the Inference Server:

npm run start-inference

Test the Inference Server:

docker exec -it text-generation-inference text-generation-launcher --help
docker exec -it text-generation-inference text-generation-launcher --env
docker exec -it text-generation-inference text-generation-launcher --version

curl 127.0.0.1:8081/generate \
    -X POST \
    -d '{"inputs":"What is Deep Learning?","parameters":{"max_new_tokens":17}}' \
    -H 'Content-Type: application/json'

curl 127.0.0.1:8080/generate_stream \
    -X POST \
    -d '{"inputs":"What is Deep Learning?","parameters":{"max_new_tokens":17}}' \
    -H 'Content-Type: application/json'

Add a new model to the MODELS json array in your ~/dev/AI/data/chat-ui.env file:

MODELS=`[{"name": "...", "endpoints": [{"url": "http://127.0.0.1:8081/generate_stream"}]}]`
Re-Install the Chat-UI :
npm run install-chat-ui

Re-Run the Chat-UI:

npm run start-chat-ui

Need further support or consulting?

Please checkout our Consulting hours.